NOTE: This article has been updated. Read the Feb 2014 update here, Updated Applying LUTs to Log footage.
We are often asked how to use these LUTs and work with Log in general, so I have put together some methods for using LUTs and other plugins to work with Log footage in different NLEs. There are a lot of great programs available that make this process very easy, like Scratch Lab, YoYotta, ColorFront OSD, and many more. For the purposes of this demo though, I'll focus on some inexpensive (or free) utilities that can tackle the problem.
We'll start with Final Cut Pro 7 & X, but here are a couple quick links to jump down to different sections - Adobe Premiere, Avid Media Composer, DaVinci Resolve.
Final Cut Pro 7 & X
There are many different plugins available for Final Cut Pro that can correct for Log footage. Below is an outline of the different available options and how to use them. These FCP 7 plugins require that footage be rendered after the plugin is applied, though some systems might be able to keep up. At the bottom of this section I've outlined how to send the corrected footage through Compressor for rendering.
LUT Buddy - FCP 7
The first option for applying LUTs in FCP 7 is a free plugin with a funny name. It is a simple plugin that allows you to add a LUT to a clip. Download LUT Buddy from Magic Bullet and install it. Here are the simple steps to apply in Final Cut Pro 7.
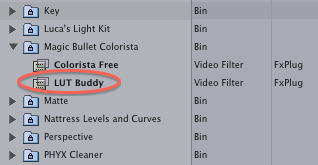
Add your Log clips to a sequence, and then locate the LUT Buddy plugin in the Effects tab. LUT Buddy is stored in the Magic Bullet Colorista folder.
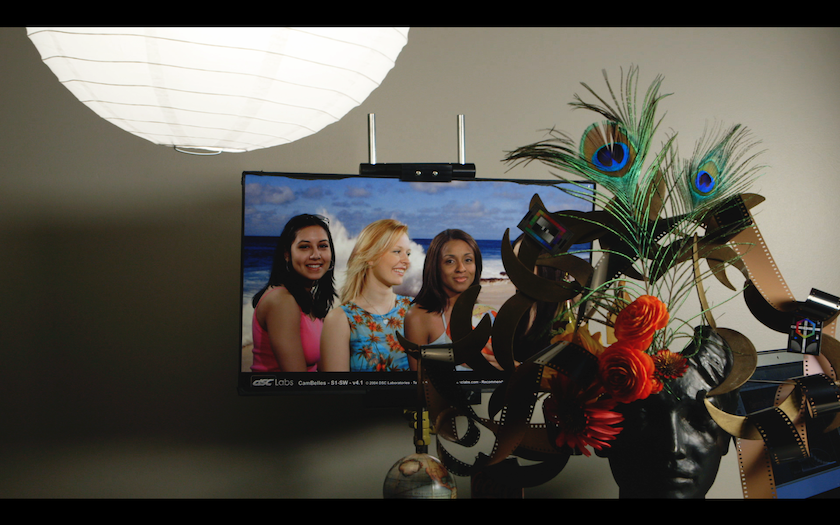
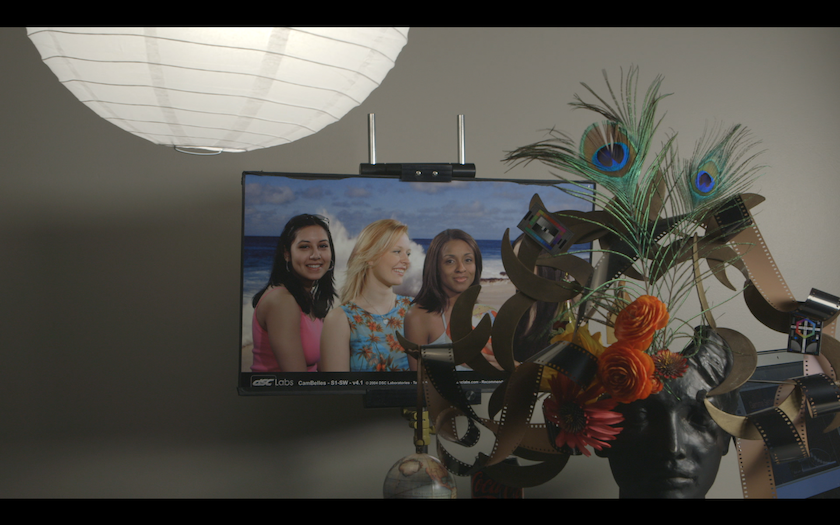
 Drag the plugin on top of your clip, and then double-click on the clip to view it in the Viewer window. My clip is in Log; notice how flat it is.
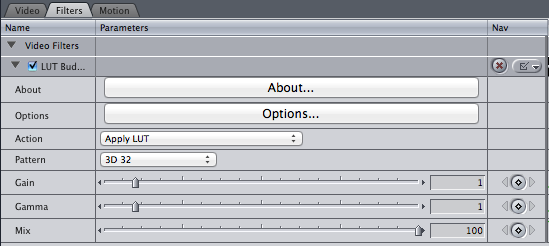
 Now click on the Filter tab to see the LUT Buddy settings.
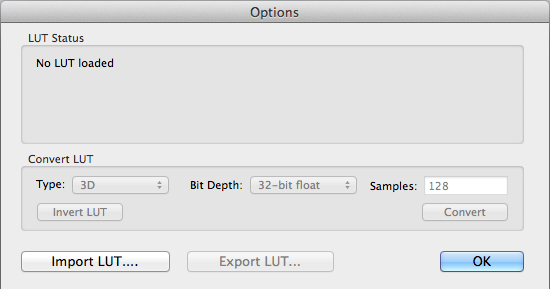
 Click the Option button and another window will appear.
Click Import LUT. This will launch the file browser. Locate the appropriate LUT and import away. Note: When using the AbelCine LUTs, I have found that .MGA files seem to work the best with LUT Buddy (Pandora LUTs).
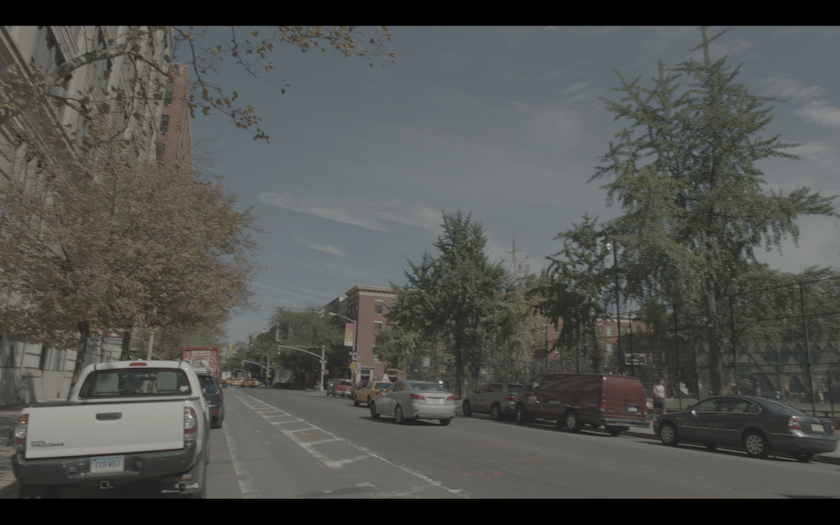
 Now the LUT should be applied, and you should see the results.
Antler Post - FCP 7
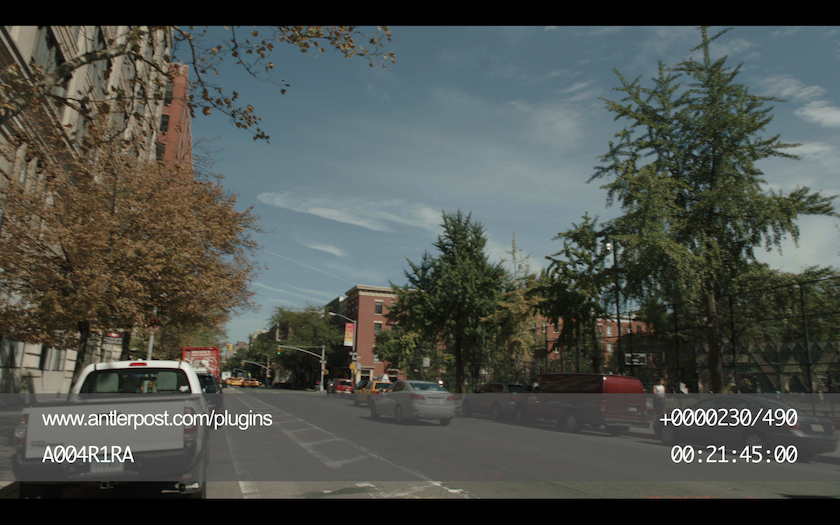
Antler Post has put together several inexpensive plugins that can take S-Log, LogC, Canon Log and Red Film Log back to a standard Rec709 look. The plugin also has the ability to add burn-ins like timecode and reel name. This is a very handy plugin when using Final Cut Pro to generate dailies.
The procedure for adding the plugin is the same as with LUT Buddy. Drag your clip to the timeline, in this case I'll use a Arri ALEXA clip.
 Now, locate your plugin. It's under the Antler folder:
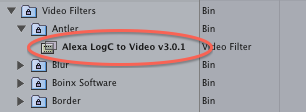 The other versions of the plugin (S-log, C-log, etc would appear here as well). Drag the LUT to the timeline, and you should see a result immediately. You do not need to load in the LUT; Antler has pre-built LUTs included with some adjustments based on the format you are working with.
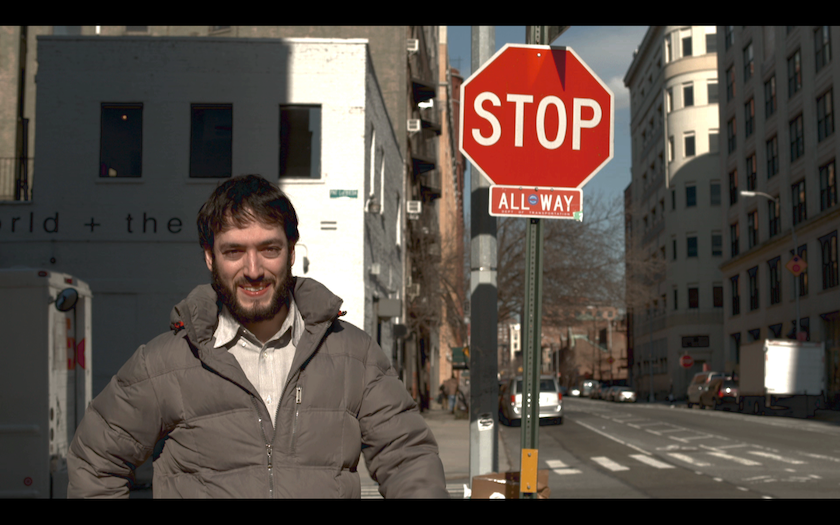
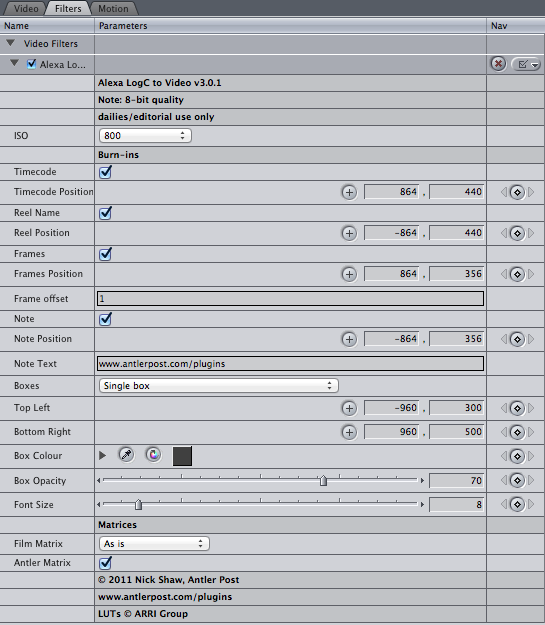 Notice above that I used the Arri ALEXA plugin and have the option of selecting the ISO. The rest of the settings are dedicated to adjusting the look of the burn-in information. You can add notes, timecode, reel name etc. Here is an example of what it looks like:
Pomfort - FCP 7 & X
Pomfort has three different plugins that work in FCP 7 and X. They have one for S-Log and another for DSLRs; these plugins provide limited adjustments. They also have one for the Arri ALEXA, which is very full-featured. The ALEXA plugin allows you to set parameters that match the camera's own 'Look' settings - read below to see how that works.
First lets look at the S-log plugin in Final Cut 7. To add the plugin, first add your S-log clip to the sequence.
 Now, find the plugin under the Pomfort folder in the effects tab. Drag on your clip and you should see the result right away.
 The plugin adds a built-in LUT and allows you to 'Mix' the effect against the original image.
 The DSLR plugin works in the same way but with a different LUT. Check out the result:
 Now let's look at the Arri ALEXA plugin, but this time in Final Cut X.
First drag your clip to the sequence, I'll start with an Arri ALEXA Log C file.
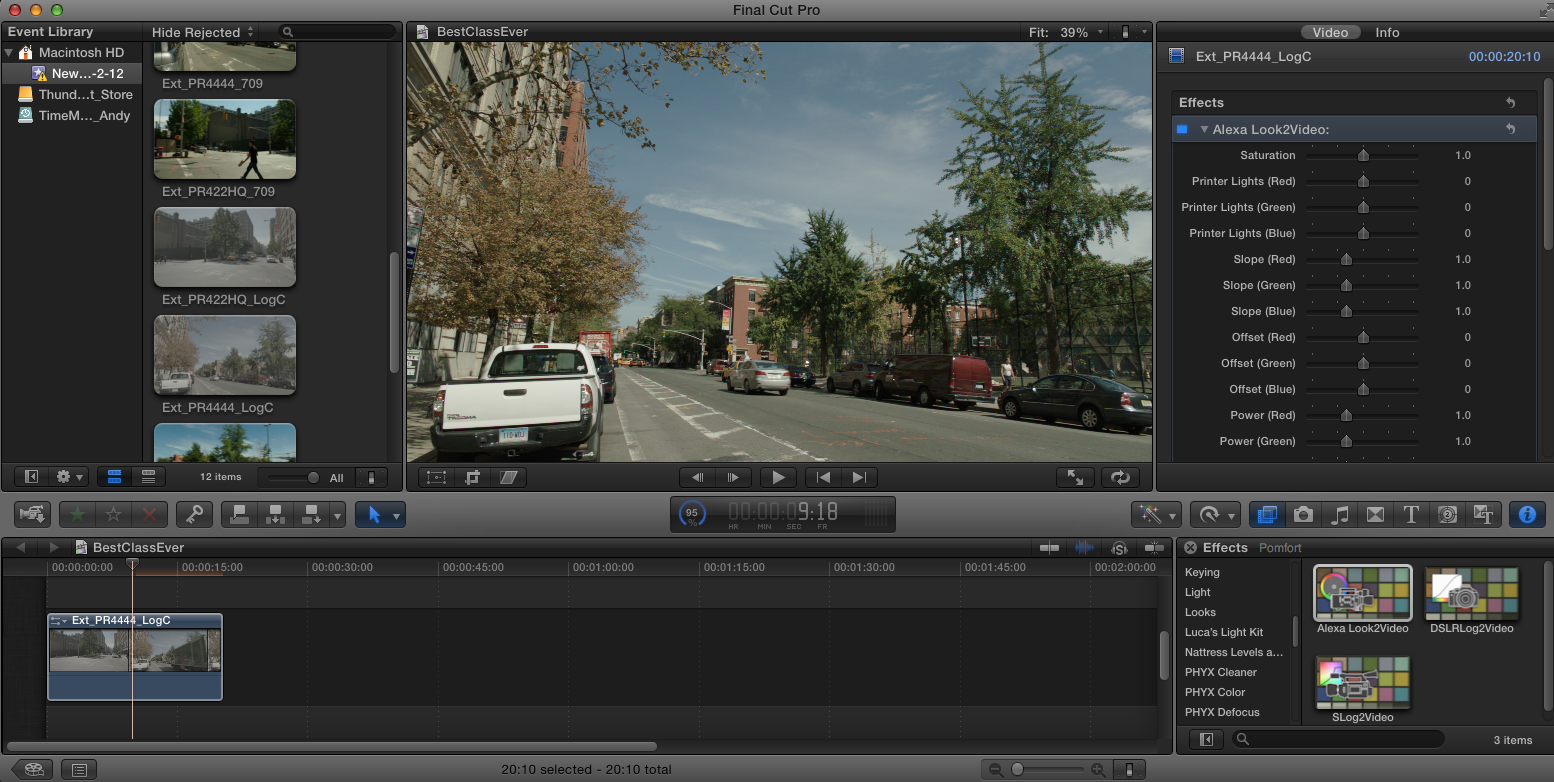
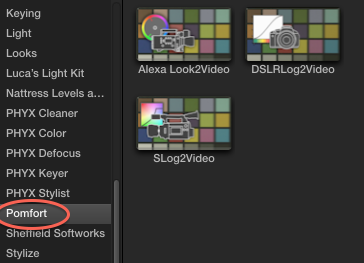
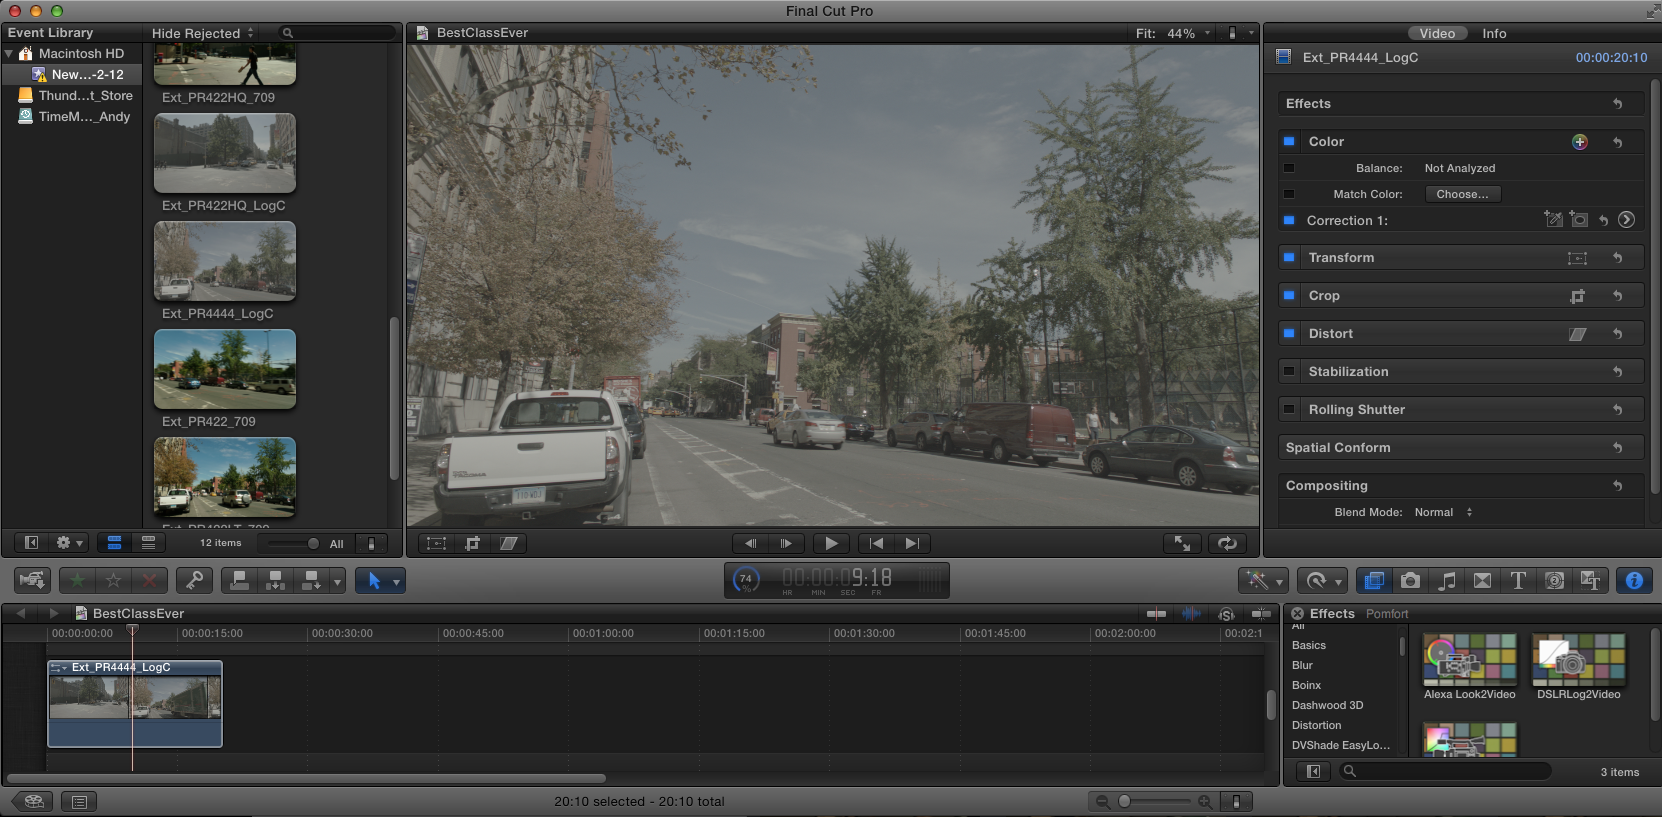 Now go to the effects browser on the right. Locate Pomfort under the full list of effects, and drag out the Alexa Look2Video file.
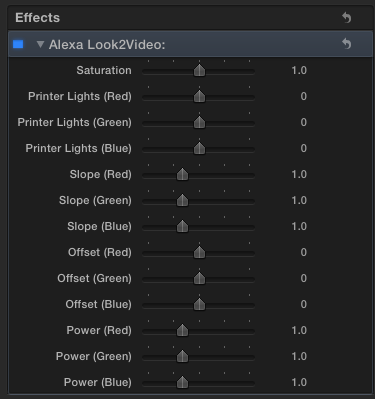
 Now visit the effects panel in the upper right. As you can see it has many more adjustments. All of these settings are designed to match the settings that can be dialed into the camera's Looks (scene files), so you can match the setting in post that you saw on set.
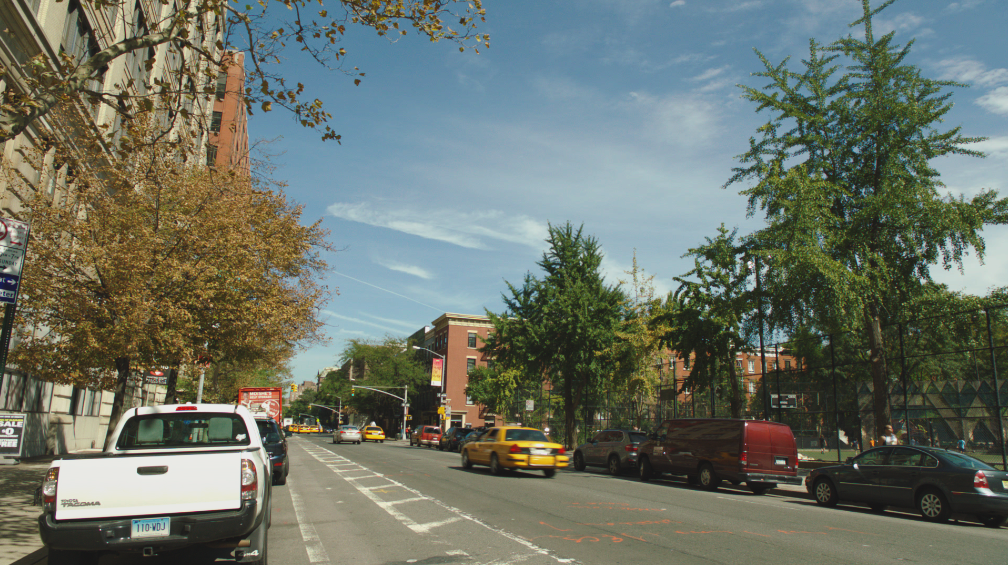
 Here is the result of the plugin:
 Note that these same adjustments will be available in FCP 7. When importing footage from Pomfort's Silverstack SET program, these plugins are applied automatically, and Alexa Looks will be carried from the camera right into FCP. Pretty amazing.
Levels & Curves - FCP 7 & X
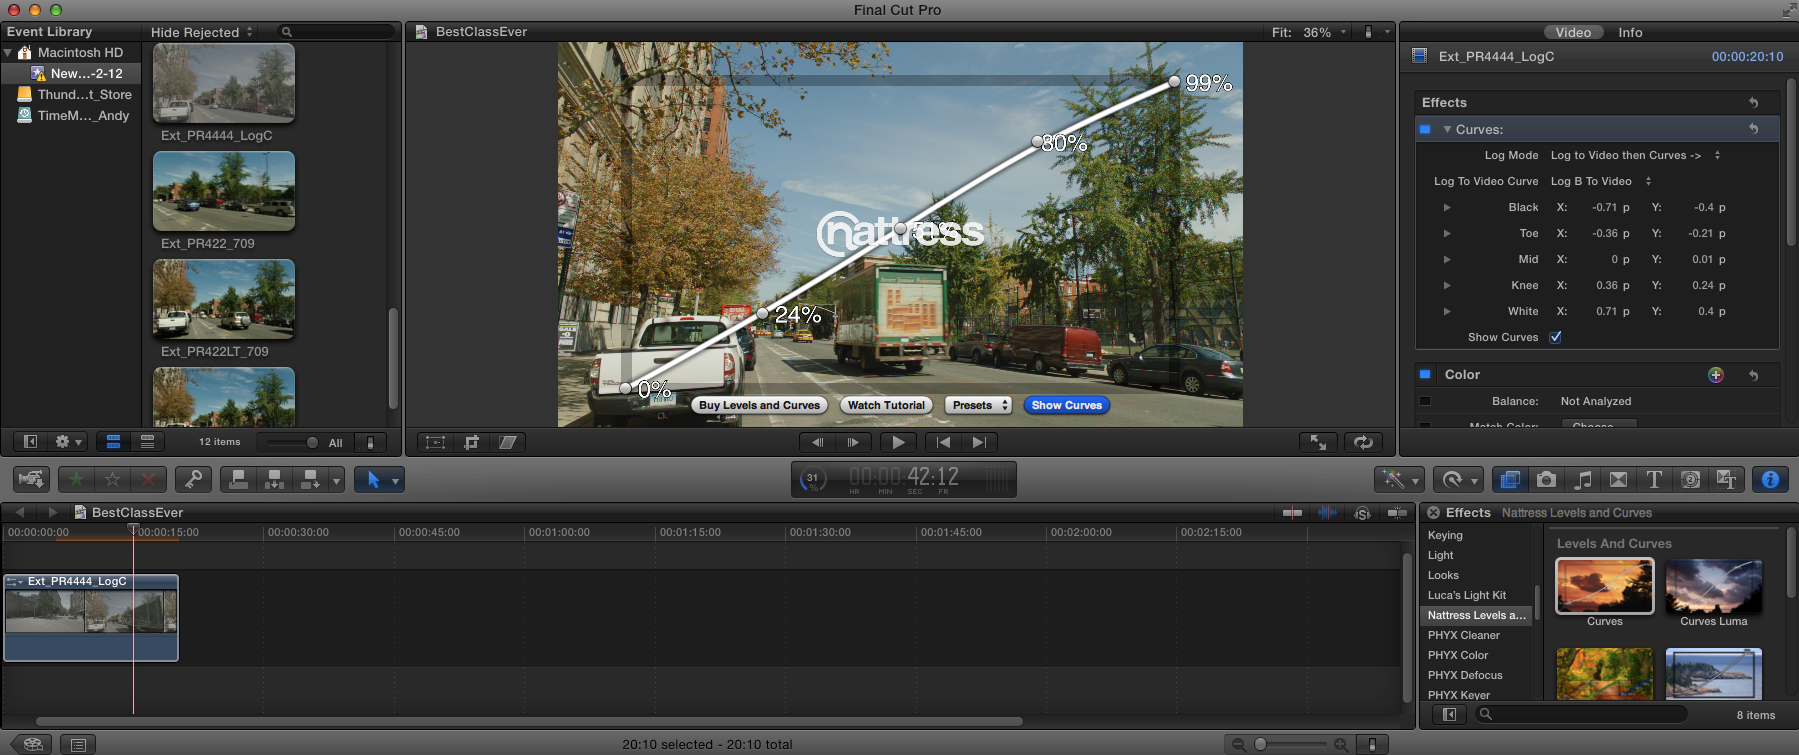
Levels & Curves is a unique plugin from Graeme Nattress that allows you to make easy adjustments to your video curves. This plugin allows you to push and pull your low end, midtown, knee and highlights in a nice graphical way. There are Log to Video presets in the 'Curves' plugin, which can easily get your footage looking good, and still have room for adjustment.
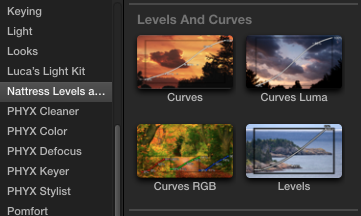
To apply the plugin, do the same steps that we saw above in Final Cut X. Drag your clip to the timeline and find Levels and Curves under the Nattress Levels & Curves folder in the Effects tab. Use the Curves plugin to start with.
 Drag on the clip and you should see a graph appear across your image.
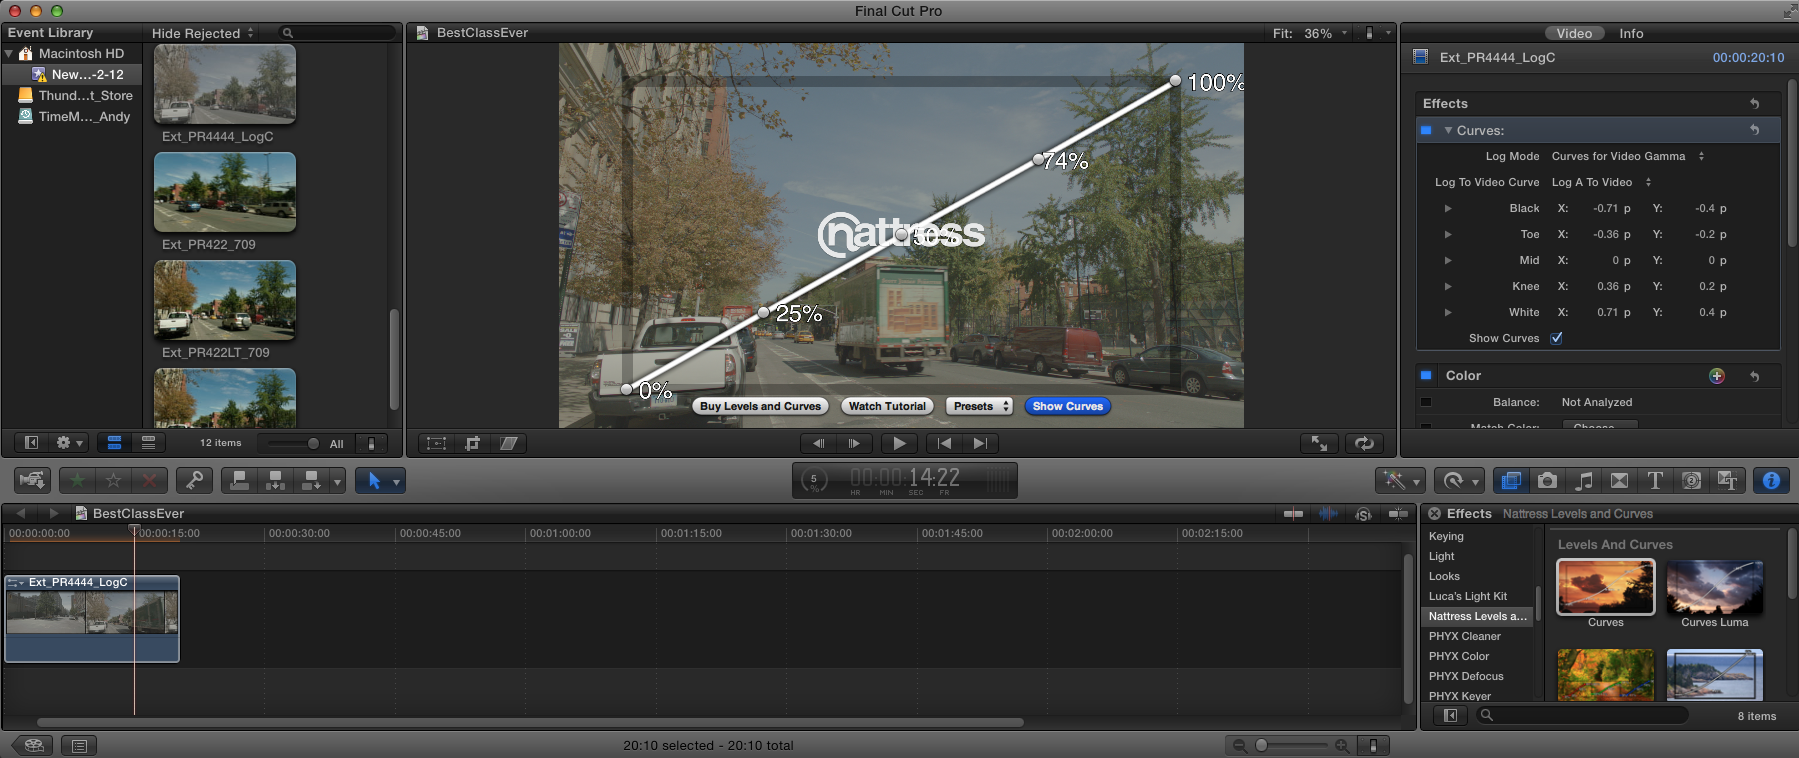 Select your clip on the timeline and visit the effects panel on the upper right of your screen.Here you can select the "Log to Video Then Curves" option from the Log mode. Below that you can select different log options.
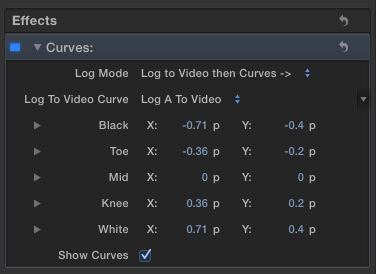 Beyond that you can make adjustments to the curves, bringing down your highlights, midtowns, and toe. With some quick adjustments you can see how easy it is to get the image looking good.
Notes on Rendering
As I mentioned at the beginning of this section, many of these plugins will require you to render your footage after the plugin is applied. In FCP X, you can turn on "Create Proxy Material" in the Preferences window, and it will start rendering the footage for you behind the scenes. In FCP 7, you will have to choose to render out the material for editing. Many people actually use FCP 7 as a dailies generation tool after applying a LUT. Here are a couple quick steps to do this:
- Apply your plugin LUT on the clips in your sequence. Any of the plugins mentioned above should work.
- Drag your clips from the sequence back into the Bin. This will create a new clip in your Bin.
- From the File menu choose to Send To -> Compressor.
- Compressor will open, and now you can render the clips out with the plugin applied. The timecode, audio and file names should all travel properly.
Adobe Premiere
As of today, I'm only aware of one plugin to apply LUTs in Adobe Premiere, but I'm sure there will be more released as the software gains popularity.
LUT Buddy - Just like in Final Cut Pro, the LUT Buddy plugin can be used in Premiere to apply a LUT. The plugin can be applied using these simple steps.
Add your Log clips to a sequence; once again I added this Alexa Log C clip.
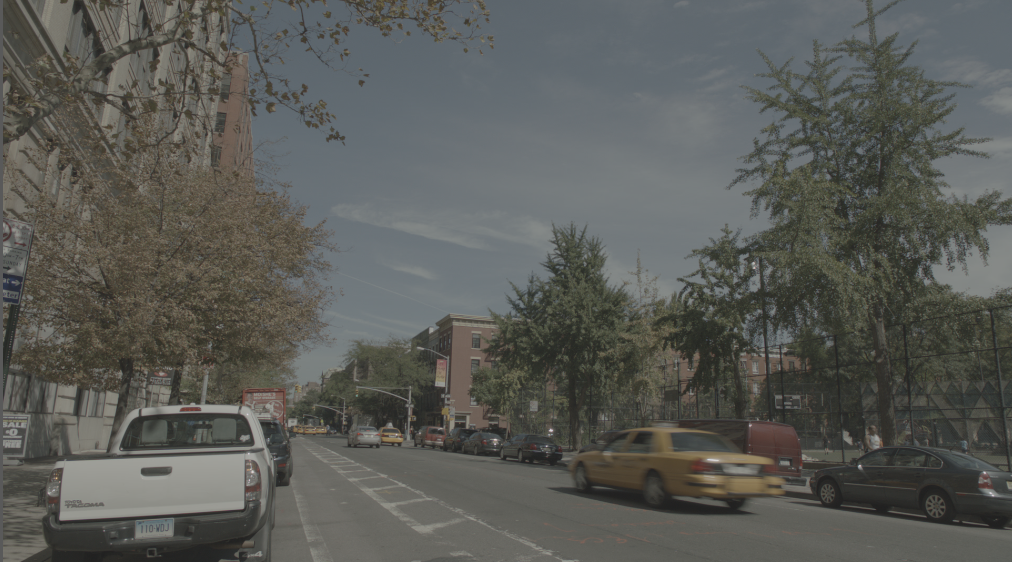 Now locate the LUT Buddy plugin in the Effects tab on the bottom left of the screen. LUT Buddy is stored in the Magic Bullet Colorista folder.
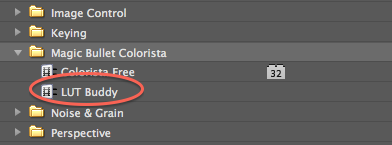 Drag the plugin on top of your clip, and then click on the clip to view it in the Effects Control panel. LUT Buddy should appear below the standard motion and opacity effects. Click the small Setup button on the right and another window will appear.
 Now click Import LUT. This will launch the file browser. Locate the appropriate LUT and import away. Note: When using the AbelCine LUTs, I have found that .MGA files seem to work the best with LUT Buddy (Pandora LUTs).
 Now the LUT should be applied, and you should see the results.
Avid Media Composer
Unlike Premiere and FCP, there isn't an easy way to apply a LUT in Avid. This could change in the future, but for now we have a couple of different options.
Correction Layer
One way to work with Log material in Avid MC is to apply a color adjustment layer across your entire sequence. This layer can be adjusted and anything underneath it will appear correct. This may seem like a simple solution. It is quick and does not require any rendering. The only annoyance is always having a top layer above your edit. Here are the quick steps to apply this layer.
Open up a new Sequence and import some Log footage. I again started with Arri ALEXA footage, but this will work with any log material.
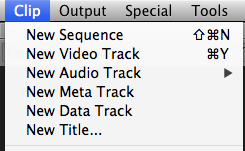
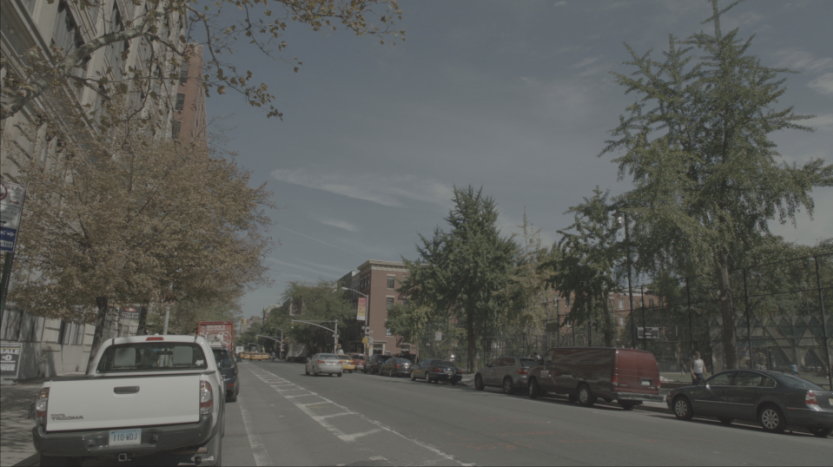 In your sequence, create a second video layer - this will be your adjustment layer. Do that by hitting Command+Y on a Mac or by visiting the Clip menu.
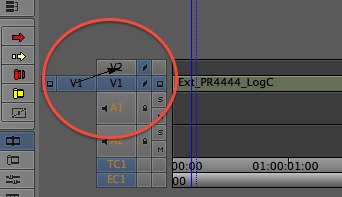
 Now you need to change your video output by clicking on the V1 output, holding down, and dragging to the V2 track. A little arrow should appear as you do this. The V1 output should then appear next to your second video track.
 Now you are ready to start adjusting color, so open up your Color Correction workspace (under Window in MC 6) to get started. There are many adjustments you can make here but I stick with a simple curve adjustment and increased saturation. There is no perfect adjustment here, just something that gets things looking OK.
 Once you make an adjustment here, you'll notice that your second video track fills up with Filler. Now anything below that track will be effected by your color correction. Notice that no rendering is required, just keep editing below that track, and you are in good shape. With a some quick adjustments, you can see how the log footage is looking quite a bit more 'normal.'
AlexICC
AlexICC is a cool little program from Light Illusions that can quickly convert Alexa Log material into MXFs compatible with Avid. The program can take Alexa MOV files and export various formats ranging from DNxHD to ProRes and H.264. It can be used with FCP or just to render out low resolution files. AlexICC can burn in a Rec709 LUT and timecode, making it a nice quick dailies tool. I put it under the Avid banner because of its ability to make DNxHD files in MXF. Here is a quick overview of how it works.
There are two versions of AlexICC you can download, version 4 and version 7. This version number refers to the number of conversions it does at once; a laptop should probably do no more than four at once. When you open AlexICC you have to select a folder where your Log C material is kept and a destination to send it to.
 When you click OK, another dialog will pop up giving you more options.
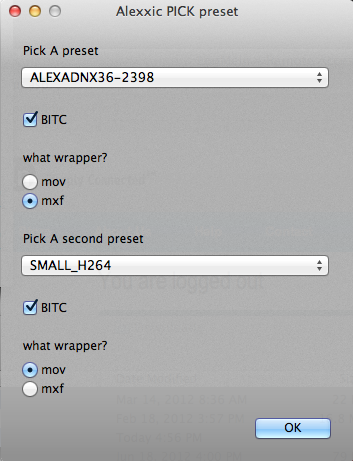 Here you can select two different files to convert your original content to and the drop-downs contain different presets. I have chosen a DNxHD 36 Mbps format and a small H.264 format, and they both have burn in timecode (hence the check BITC). When you hit OK, AlexICC will launch many terminal windows. Don't panic, this is how it works. It will speed through the conversion and you'll have yourself some nice looking footage.
DaVinci Resolve Lite
DaVinci Resolve Lite is the free version of Resolve from Blackmagic Design. It has many of the same features as the full licensed version and it's free, so try it out today. The process for loading external LUTs into Resolve can be quite tricky, at least in the current version. The files have to go into a specific folder on a Mac to get them loaded. Here are a couple of steps to loading a LUT into Resolve and then applying it.
First, before even launching Resolve, we need to bring any LUTs we want to use into Resolve's LUT folder. The folder is located deep in the file system. You can find it using this path: Macintosh HD -> Library -> Application Support -> Blackmagic Design -> Davinci Resolve -> LUT -> ARRI
 Now you are probably wondering why the Arri Folder - it just seems to work here, and we aren't sure why. You can put various 3D LUT formats in there, I stick with ones made in the Resolve format. After that, launch Resolve and visit the LUTs tab on the top right. Here we can select a LUT to apply to my entire project, either on input, output or to the display. You should find the LUT you added earlier in this list now.
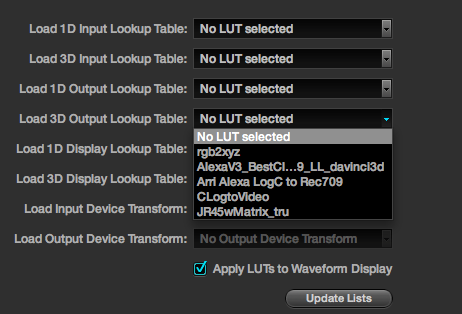 This is a very quick way to get all of your material addressed with one LUT, but I prefer to add LUTs manually to each clip. To do that go ahead and start a new project or enter an existing one. Bring in your material and visit the Color tab where you do your grading. Each clip will have a single node associated with it, which can be found in the upper right.
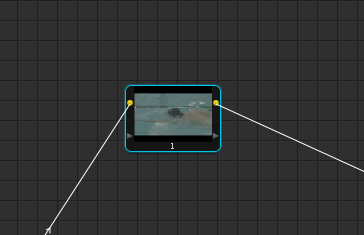 In Resolve, you can add more nodes to do different corrections. You can add a LUT to one of these nodes by right-clicking on it, and navigating down to 3D LUTs. This should list the LUT that you added before.
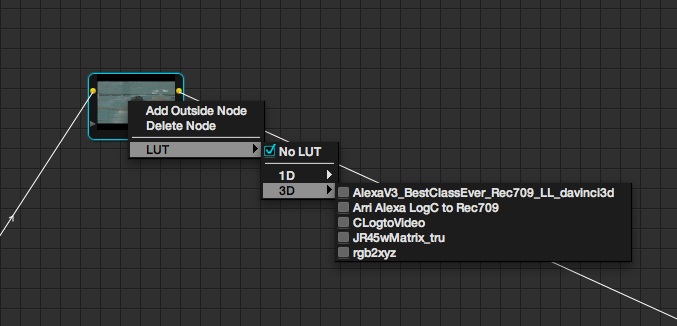 Select your LUT and you should see the result right away. Resolve is a complicated program, and I've obviously skipped some steps here, but there is a lot of great information on the internet about how to use it. Check out the Arri workflow document on working with Resolve; it outlines these steps in more detail, as well as how to bring the material in and out of an NLE. You can use these steps with any log material and the right LUT. Resolve Version 9, coming this Summer, promises to have much easier methods for importing and exporting both 1D and 3D LUTs. You can purchase the full version of DaVinci Resolve 8 from AbelCine.
Hopefully these steps have made your workflow a bit easier. What's your preferred method for working with Log material? Let us know in the comments section.
