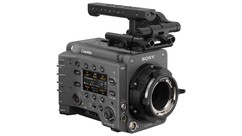
These files are designed both to change the camera's look, and make matching the FS7 and F5 cameras easier. Our focus on these files was to create nice skin tones, matched to our original files, and give a nice overall look. We've made it easy to download all the files here: Sony FS7 Scene Files & Sony F5 Scene Files. You can also download each file individually; below you'll find an example image and a short description of each.
Instructions for loading the scene files are at the bottom of this post.
JR45CINE
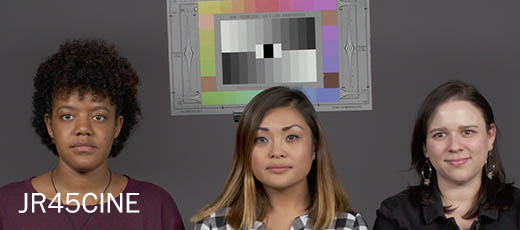
JR45Cine is a match to our original custom file for the VariCam and is designed to give you pleasing colors and good dynamic range. I started with HyperGamma 7 for a nice amount of range, but this profile is not so flat that you need a lot of post correction. In a bright, high contrast scene, you may choose to go with HyperGamma 8 for more range in the highlights. You could also turn on S-Log3 for even more highlight control, but I would probably recommend post correction at that point. Download individual zip files of each camera's settings: Sony FS7 & Sony F5
JR45VIDEO
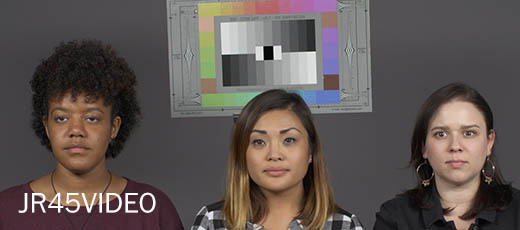 JR45Video is also a match to one of our original VariCam files; it is designed to give you nice colors and a good amount of contrast. I used HyperGamma 4 as a starting place, which provides fall-off in the highlights, but with enough contrast so that it doesn't require much post correction. HyperGamma 3 or even the Standard gammas would also work well here for even more contrast. Download individual zip files of each camera's settings: Sony FS7 & Sony F5
AB-NORM
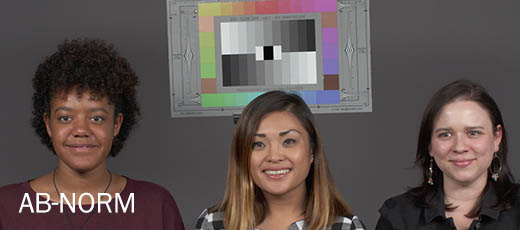 This is our AbelCine Normal file, and it is also designed to match the F3 scene file we created in the past. It is a colorful look with pleasing skin tone reproduction and plenty of contrast. With this look, I used HyperGamma 3 for the contrast and for a much simpler post process, but if you like it then also try it with different HyperGamma settings for more range. Download individual zip files of each camera's settings: Sony FS7 & Sony F5
AB-HIGHLIGHT
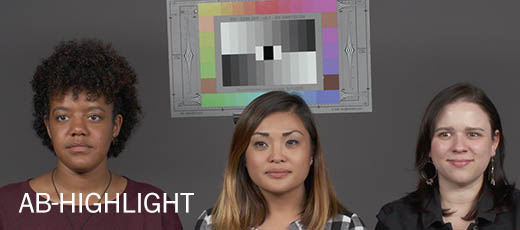 The AbelCine Highlight file has the same settings as the AB-Norm file, but uses HyperGamma 7 for more dynamic range in the highlights. You could easily create just one scene file for both AB-Norm and AB-Highlight, then switch between HyperGammas on the outside of the camera. HyperGamma 8 would also work well here, as would S-Log3. When using these higher HyperGammas, you'll need to consider that some post color correction may be needed, but not too much. Download individual zip files of each camera's settings: Sony FS7 & Sony F5
AB-HIGHSAT
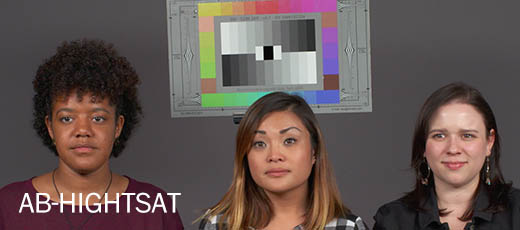 This is our AbelCine High Saturation file, which is a match to our original F3 file. It has plenty of color saturation, and it uses HyperGamma 3 for more contrast. If you like the file and just want to take down the colors a bit, you can do that easily by adjusting the Level setting under Matrix. Download individual zip files of each camera's settings: Sony FS7 & Sony F5
Scene File Loading Instructions
If you download the full set of scene files for the FS7 or F5, follow these installation instructions.
- Insert & format an SD Card in the Sony FS7 or F5. Find this under the camera's media menu: Menu ➔ Media ➔ Format Media ➔ SD Card
- Unzip the AbelCine FS7 or F5 scene files on your computer. This should create a folder called 'private'.
- Connect the SD Card that you just formatted in the camera to your computer.
- Copy the 'private' folder onto the root directory of the SD Card, replacing the private folder that the camera created.
- Load the SD Card Back into the camera.
- Load the scene files under the camera's file menu: Menu ➔ File ➔ Scene File ➔ Load SD Card
If you downloaded an individual scene file from the list above then things are a bit more complicated. Here are the basic instructions:
- Insert & Format an SD Card in the Sony FS7 or F5. Find this under the camera's media menu: Menu ➔ Media ➔ Format Media ➔ SD Card
- Write a blank scene file to your card to create the correct folder structure on the card. Do this in the camera's file menu: Menu ➔ File ➔ Scene File ➔ Save SD Card. Just write any file to the SD card, we can delete it later.
- Unzip the AbelCine FS7 or F5 scene file on your computer. This should create a .SCENE file.
- Connect the SD Card that you just formatted in the camera to your computer.
- Copy the .SCENE file to the following folder on the SD card: private ➔ Sony ➔ PRO ➔ CAMERA ➔ PXWFS7 (or PMWF5 if you are loading F5 files). If you see another file in there, go ahead and delete it, this is what we just created in Step 2.
- Load the SD Card Back into the camera.
- Load the scene files under the camera's file menu: Menu ➔ File ➔ Scene File ➔ Load SD Card
If you're interested in learning even more about the FS7, check out our Sony FS7 workshop.
