Tripod
First, we shot with the tripod. It was the quickest to get going but overall the slowest because we needed about 16 setups to cover the scene. Each time the actress moved, we needed to cut and move the camera or we would have missed the action. If you only have an actor for a short amount of time, or you want to generate some momentum in your shoot, the tripod is a tried-and-true method to get started quickly.
The tripod also allows for the most control as a director. We could also light each moment specifically, knowing where the frame line was going to be. We had the dancer repeat the same move again until we were all happy with it — an example of this was the jump at the end. In this video, we did it six times for the tripod in order to get the best version.
We could have multiplied the tripod and slider coverage by adding other cameras, a topic we’ll explore in an upcoming video about multi-camera shooting.
Slider
The slider was next and it had many of the conveniences that the tripod offered, but with the advantage of adding movement and paralax to the shots. We had a short 4’ slider, but it really added a lot of production value, especially in the wide shots. We could have made more of the slider had we had more of a foreground in our set.
Handheld
Handheld really stood out from the others in terms of quality. It gave us that immediate, alive feeling that the others lacked, and it injects a real sense of personality into the footage. That said, it's a look that doesn't suit every scene or filming style.
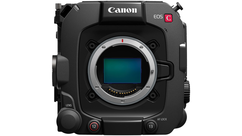
It was super quick to set up and shoot, but was also the hardest to focus because the distance between subject and camera changed in jerky footsteps. We used the Canon C200 with Dual Pixel Autofocus and it held focus as long as the subject was in the centre, which limited our framing somewhat.
If I only had an hour to shoot this scene, I would have used handheld. This is the reason it shows up in so many low-budget short films.
Gimbal
The gimbal is the most expansive way to shoot. It requires the most initial setup time, not to mention a lot of experience, in order to do well. Gimbals are also the most versatile; both highly mobile and stable, they can easily recreate the shots from most of the other modalities.
That said, the gimbal is by far the hardest to operate. It is more strenuous on the operator than the performer, and at 90 seconds we were right at the limit of a reasonable scene. A SteadiCam would solve this problem, but it further increases cost and the amount of experience needed.
As far as the edit goes, the slider and the gimbal cut together really well. The tripod could fit in anywhere, but the handheld footage really only cut with other handheld footage – it doesn’t really fit with the others.
SUMMARY
All four scenes can be found at the end of the video, or you can watch them by clicking the links below:
Tripod Scene - 10:11
Slider Scene - 12:03
Handheld Scene - 13:55
Gimbal Scene - 15:51
At the end of the day, these four modalities are just tools in a toolbox, but it's great knowing the advantages and limitations of each one. There is no magic bullet – just tradeoffs between speed, control, expense and experience needed. Knowing what best suits your story will help you get the most from any system.
About Rubidium Wu
Over the past 2 decades, Rubidium as directed and produced numerous projects from art documentaries to commercials for Nintendo and Sony PlayStation. His Kickstarter-funded web-series Silent City gained over a million views and was featured by the Wall Street Journal and the New York Post. His first feature, the thriller Brooklyn Tide, shot with the original Canon C100, is available on Amazon Prime. Rubidium explores the techniques and technologies that continue to transform filmmaking on his YouTube channel, Crimson Engine. He will be teaching a Canon C200 Masterclass next month in New York.




AbelCine encourages comments on our blog posts, as long as they are relevant and respectful in tone. To further professional dialog, we strongly encourage the use of real names. We reserve the right to remove any comments that violate our comment policy.
AbelCine publishes this blog as a free educational resource, and anyone may read the discussions posted here. However, if you want to join the conversation, please log in or register on our site.
We use Disqus to manage comments on this blog. If you already have a Disqus account registered under the same email as your AbelCine account, you will automatically be logged in when you sign in to our site. If not, please create a free account with Disqus using the same email as your AbelCine account.