Canon has just started to ship the WFT-E6A adaptor, and we've received a few questions as to how to best set up the adaptor and your device, so I've put together this guide to help you get started. The most common connection will likely be a point-to-point connection (AdHoc) between the camera and your device, so that will be the method we use here today.
I included the above video of the C300 connected to my iPad so you can see how quickly the camera responds to camera control inputs, and how the image preview feature works. Keep reading below if you'd like to see how to connect the two!
On the C300
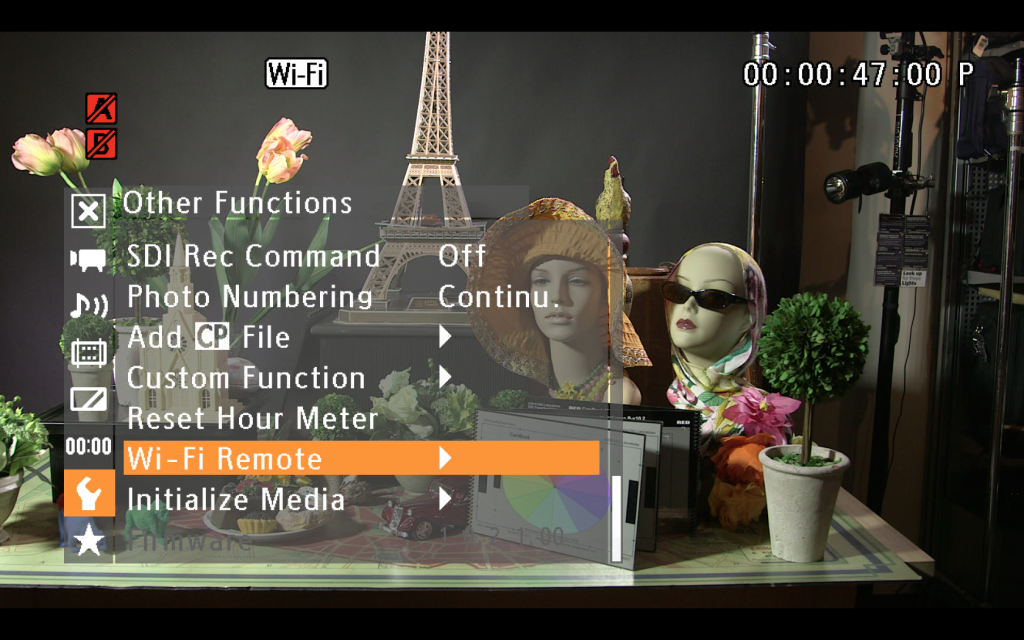
Once you have the adaptor installed, you'll find the WiFi settings near the bottom of the Other Functions menu. From there you'll want to select Connection Wizard, Manual Setup Method, then Ad Hoc 11b/g. The 11a mode will work with older computers, but modern devices such as an iPhone or iPad require 11b/g mode.
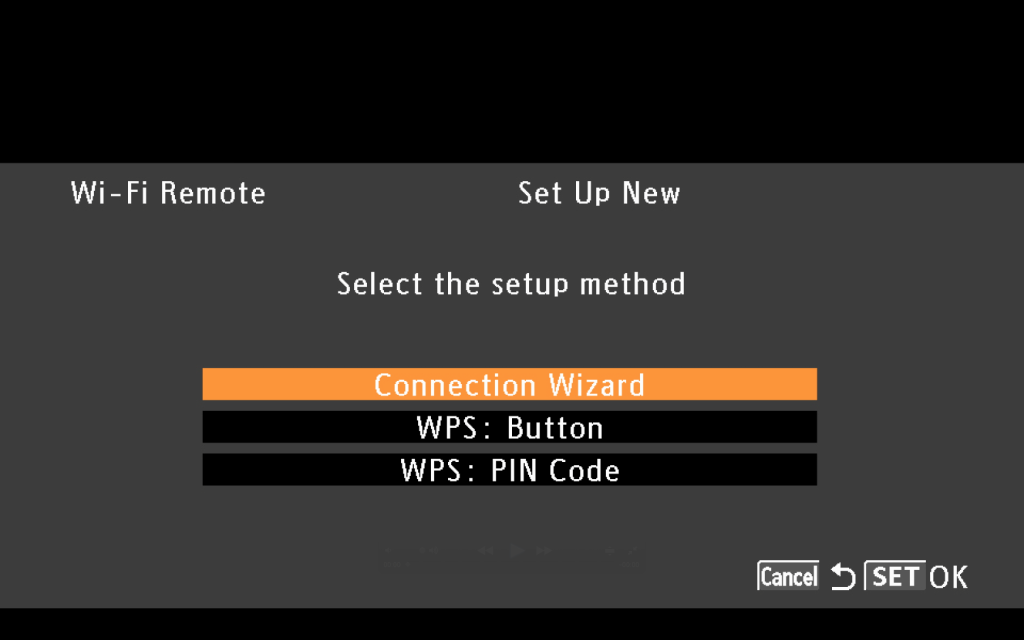
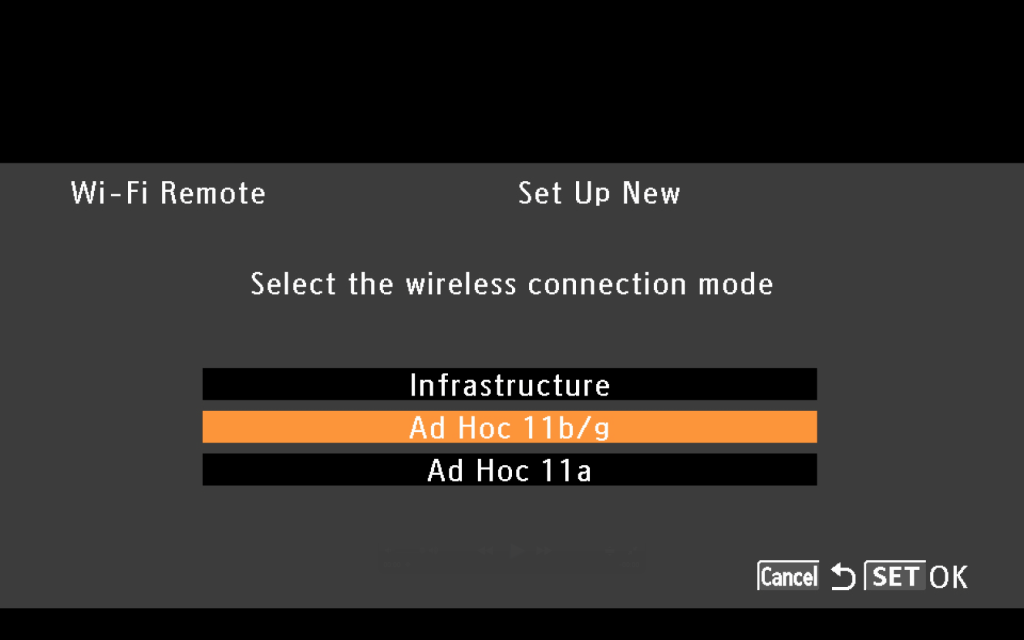
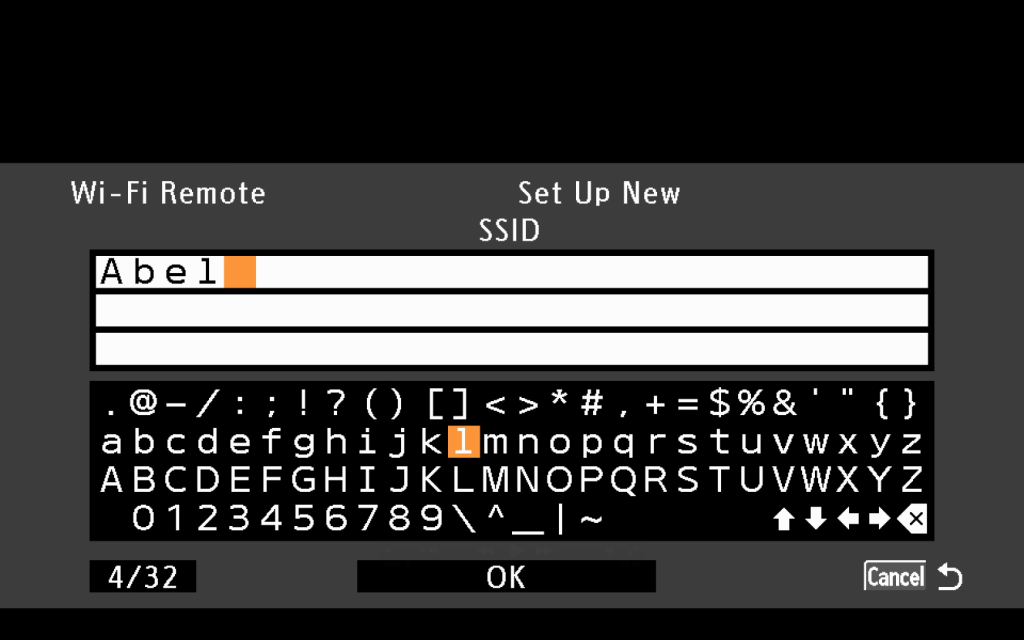
You'll enter an SSID (the name of the network you're creating) in the next menu, then select a Wi-Fi channel, which I usually default to automatic. I'm choosing to not use any password protection (encryption method) for the Wi-Fi network since it's a point-to-point connection, but you can choose to protect the network if you wish.
In the Setup Method screen, you'll want to select Manual, then enter an IP Address and Subnet Mask of your choosing. You can assign any IP Address and Subnet Mask value you wish, and you do not need to enter any values for Default Gateway.
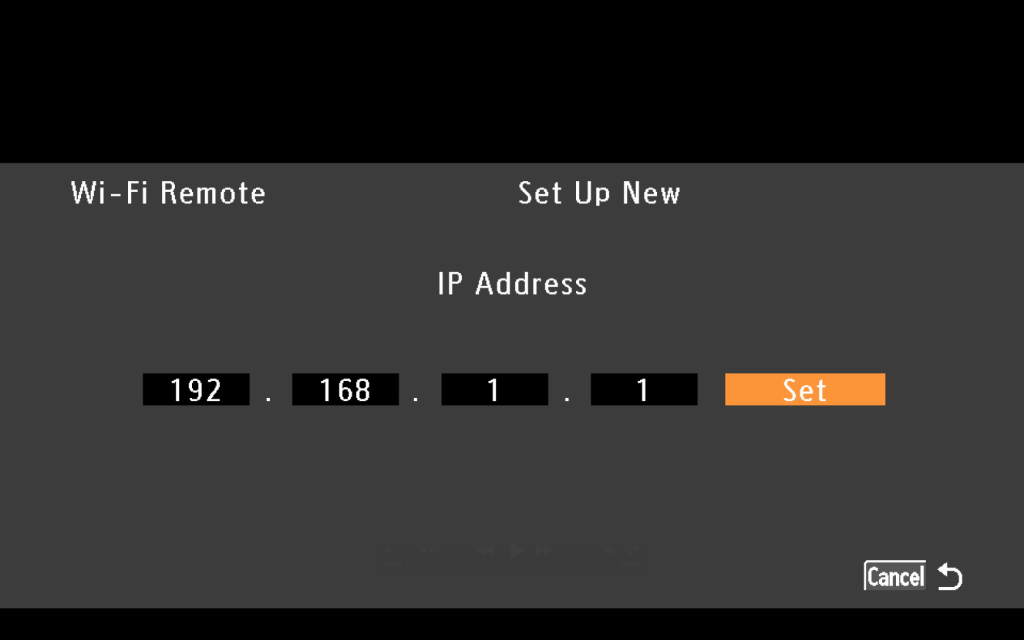
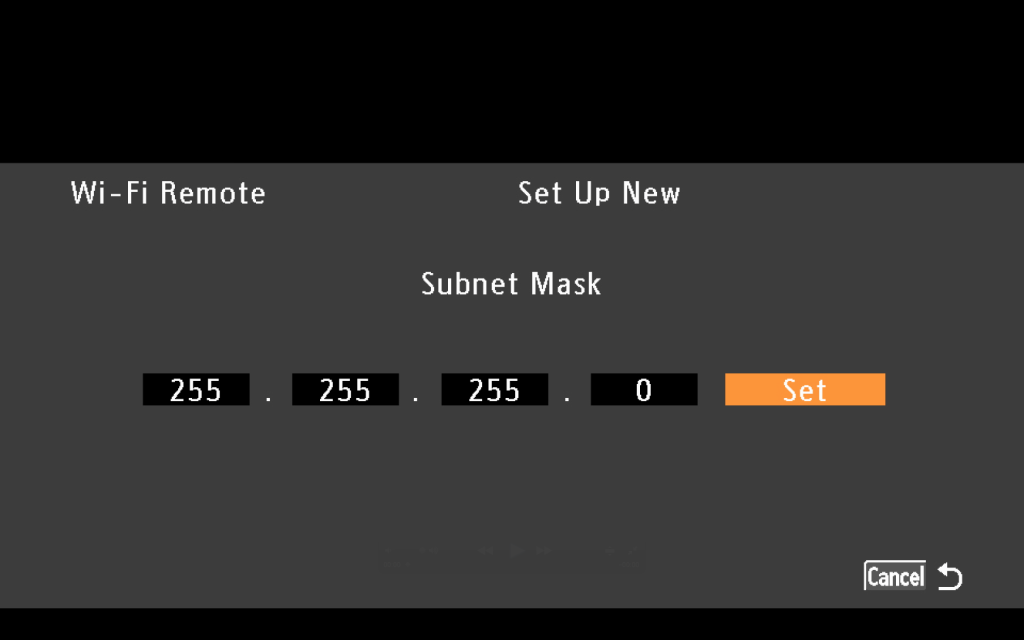
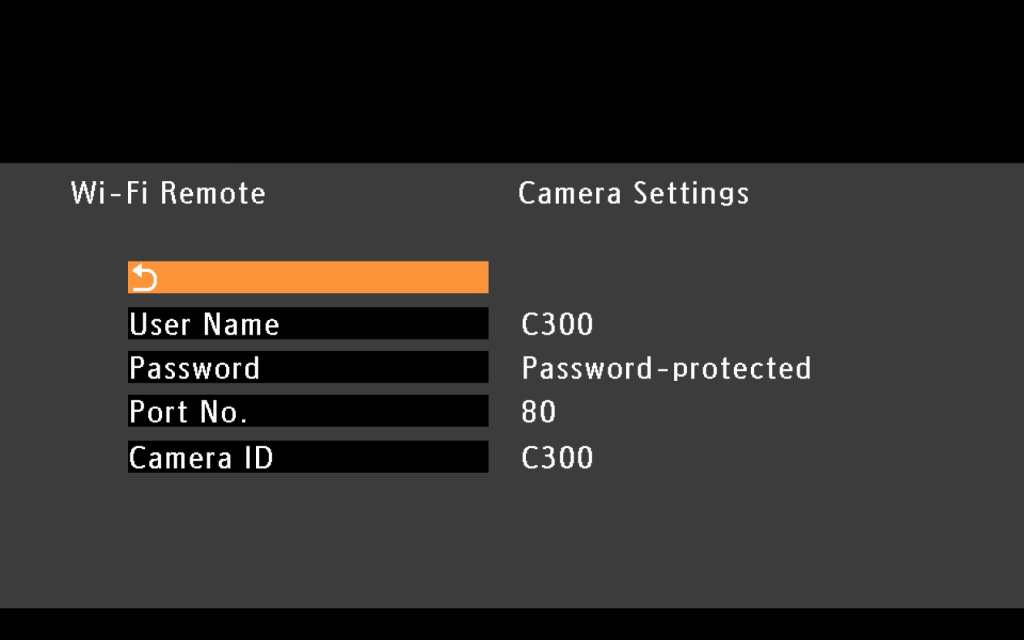
After you've finished inputting your TCP/IP settings, you can save your network configuration to one of five available slots. You'll then need to assign a User Name and Password in the Camera Settings section of the Wi-Fi Remote menu. You'll need this information in order to log in to the camera from your web browser.
On your phone, tablet, or computer:
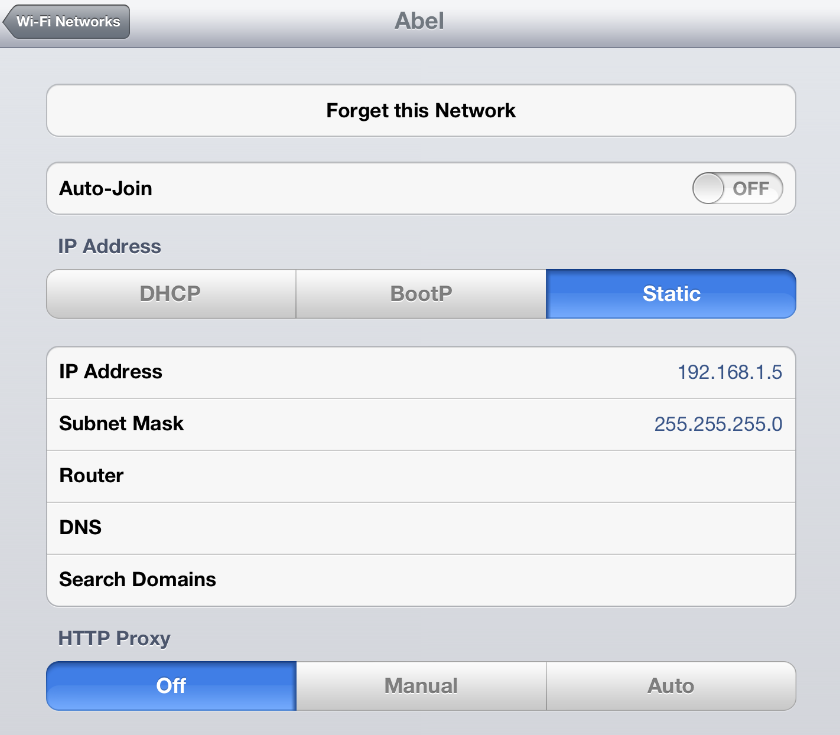
I'm using an iPad for these examples, but you can certainly apply any of these settings to a different device, as long as it has a web browser. In your Network Settings, you'll join your newly created network, and set your IP address manually by turning off DHCP. When entering your IP address, you'll want to use the same prefix as the one you set on the camera. For example, I assigned the C300 with an IP address of 192.168.1.1, so I set my iPad's IP address to 192.168.1.5. The subnet mask should be the same as what you set on camera, so in my case it would be 255.255.255.0. You can leave the Router, DNS, and Search Domains fields blank.
After you've entered this information, all you have to do is point your web browser to the IP address of your C300. Again, in my case the IP address of the camera was set to 192.168.1.1, and once I entered that in to the address bar of my browser I was prompted to enter the User Name and Password I previously set on the camera.
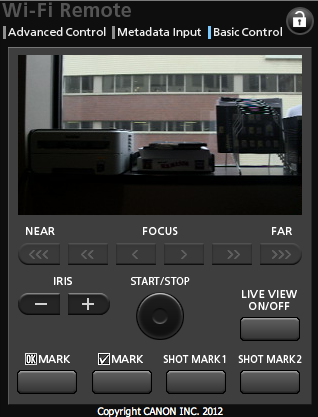
The C300 Wi-Fi Remote offers complete image control and even includes a live preview of the image. It's not fast enough to pull focus or quickly frame a shot, but it's certainly useful for when the camera might be out of reach on a jib or mounted in tight spaces. In addition to exposure adjustments and remote start/stop, you can also add clip metadata via the Metadata Input page. There's even a Basic Control page that works really well as a remote start/stop from a smart phone. You can only connect one device to the C300 at any given time, but I tested the remote with an iPad, iPhone, and MacBook Pro successfully.


I hope you found this guide helpful. Let me know in the comments if you have any questions, or if you have any future topics you'd like us to cover on the blog!
