At the high end of the business, this format is generally captured with “true” anamorphic lenses and usually in ARRIRAW to provide maximum flexibility for post-production and VFX. However, there are a few additional ways to treat content using this classic aspect ratio or, as you’ll see in the video above, utilizing anamorphic lenses in aspect ratios other than the classic “‘scope” ratio of 2.39:1.
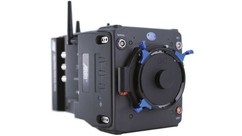
These recording modes require the use of ProRes, rather than ARRIRAW, since RAW video is (generally) never scaled or processed the way decoded (or “de-bayered”) video can be. The upshot is that, by recording in ProRes on the ALEXA Mini, you can have the camera do the de-squeeze, if using an actual anamorphic optic, at the time the clip is recorded. This has advantages for productions that would like to use anamorphic optics for their characteristic look but can do without the attendant workflow implications. Of course, if you'd prefer to do your own de-squeeze in post, that mode is avaiable as well.
Enough introduction — in the video above, I show three ProRes recording modes on the ALEXA Mini: HD Anamorphic, 2.39:1 2K Anamorphic, and 4:3 2.8K. For each mode, I'll first look at the camera's menu set up while on a stage and see the resulting image displayed on a monitor. Next, I go outside and capture a shot in that mode. I keep the composition the same for all the shots. Finally, I'll show you possible workflows for the footage in DaVinci Resolve. I say possible, as with certain modes, there is more than one way to post the images. Note that the Mini am using has the optional 4:3 license key installed.




AbelCine encourages comments on our blog posts, as long as they are relevant and respectful in tone. To further professional dialog, we strongly encourage the use of real names. We reserve the right to remove any comments that violate our comment policy.
AbelCine publishes this blog as a free educational resource, and anyone may read the discussions posted here. However, if you want to join the conversation, please log in or register on our site.
We use Disqus to manage comments on this blog. If you already have a Disqus account registered under the same email as your AbelCine account, you will automatically be logged in when you sign in to our site. If not, please create a free account with Disqus using the same email as your AbelCine account.